Ready To Get Started On Your Finished Basement?
If you are like many modern homebuyers, the basement can be a make it or break it feature of a house. That is because of the incredible amount of options that a finished basement can provide. From common areas and entertainment spaces to additional bedrooms and bathrooms, the basement is quickly becoming the revolutionary home setting that homeowners are seeking. If you are ready to finish your basement and add an entire other layer to your home, you might be wondering exactly where to start. We hope that this guide will lend you a slew of tips and considerations to ponder when designing your finished basement.
Step One: Analyze, Inspect, and Repair
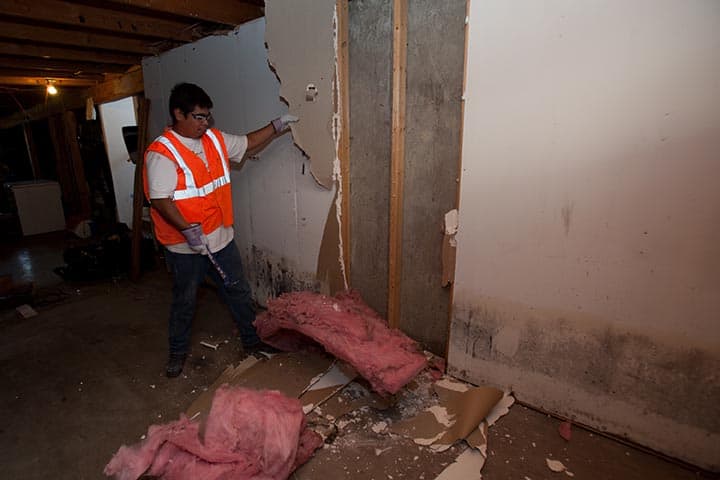 Whether your unfinished basement is comprised of concrete slabs and open wood frames or is a little more prepared, your first step is to ensure that any pieces of the unfinished basement that are not in top shape are found and repaired before beginning to finish. Doing this will prevent you from having to do costly demolition later on in order to fix leaks or cracks in the foundation that you missed.
First, if you have one, start with the open foundation. You are looking for sealing issues in your basement. Lay down a thin plastic sheet and tape it to as large an area of the foundation as you can. Leave for a few hours. When you return, if there is condensation formed under the sheet then your foundation has a sealing issue. If condensation has formed on the top, there is likely a sealing issue in the walls or a humidity issue forming somewhere else. While this can likely be fixed naturally when the basement floor and walls are being finished, the condensation can still collect on the unseen side and cause damage.
Next, check the open wood framing for any insect damage or water rotting. This can be a massive issue later on as you will have to take down the sheetrock or whatever you used to seal the walls in order to access the damage. Make sure to take care of termite problems or water leaks before sealing your finished basement!
Step Two: Designing Your Finished Basement Layout
Alright, this is considered by most to be the best part (apart from actually experiencing the finished basement)! Now is when you can begin to let your imagination fly. Really, what you do with the unlimited possibilities of your basement is up to you. However, there are a few general tips to consider when planning your finished basement.
Naturally, lighting can really assist with creating a homey feeling in your finished basement. However, natural lighting can be less decisive than you might think. When guests or potential home buyers enter your finished basement, they don’t need to be tricked into thinking it is just another part of the house by trying to focus on natural lighting. Simply ensuring that there is enough artificial lighting to fill the whole space is enough to impart a home-like feeling.
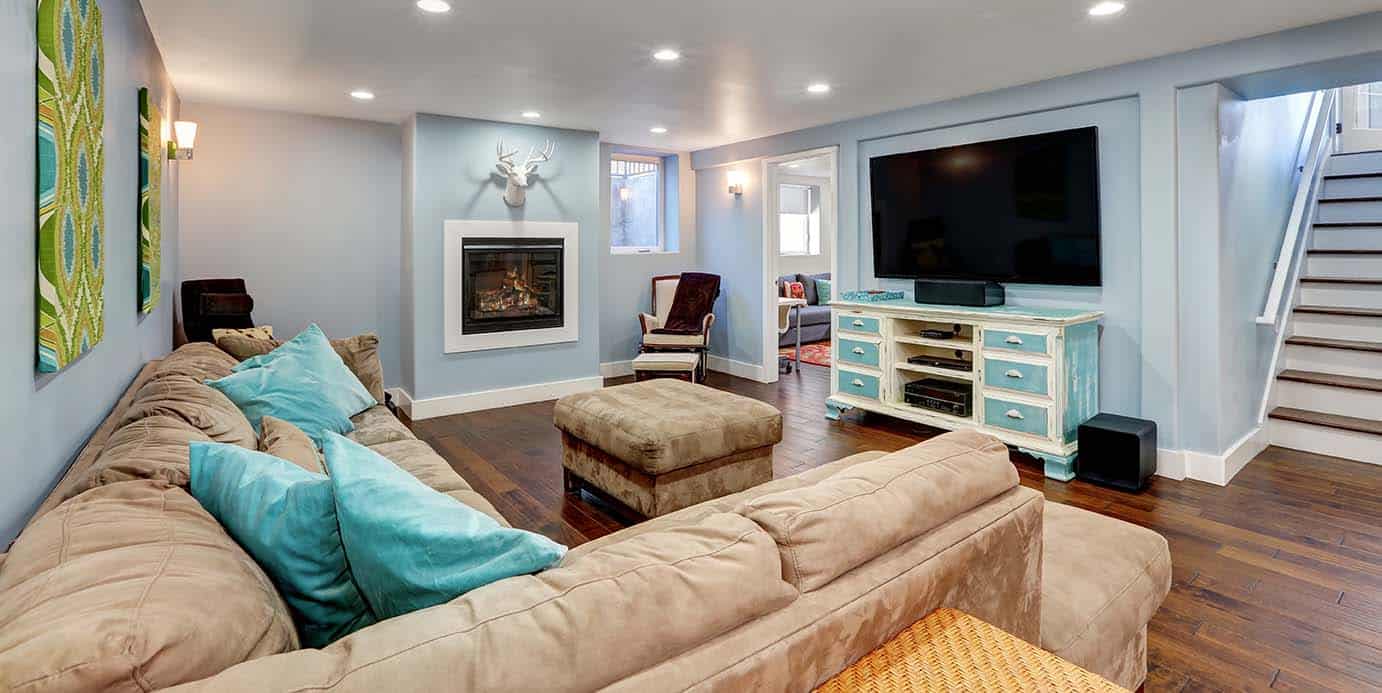
At the same time, if there is a large egress window that provides a great deal of light then that might be a good option to center a gathering space (such as a common area or bar) around. At the same time, a darker area of the basement could be a perfect place for a home theater or entertainment center.
Speaking of windows, it is important to remember that a bedroom must have an egress window to be considered an actual bedroom on a house listing. Make sure to plan your finished basement bedrooms around egress windows if you plan on them adding value to the house. If you are considering adding a bar or bathroom, it is important to center them near a place that you can cut into a water pipe and drain.
When designing the layout of your finished basement or remodel, it is also important to prepare for possible issues such as flooding. If there is a water pipe issue that induces flooding, the basement is the likely candidate to be filled with water. Making sure you have a sump pump installed that can be turned on to suck water out of the basement and back outside is the best way prepare for flooding. In fact, it’s really not a bad idea to have a back up too!
Step Three: Get To Work!
Now it is time to dig deep into your unfinished basement and bring out the elbow grease. Finishing the walls first is the typical process. Make sure to leave plenty of space between appliances and leave a way to access them. Insulate all pipes before adding drywall or sheetrock. The floor will be the next step. An easy and beautiful way to create a basement floor is through inexpensive hardwood sheets.
Remember, while it is possible to finish your basement yourself, you can ensure proper remodeling and value addition by going with experienced basement finishing companies such as the Denver-based Affordable Basement Finishing Co.